


A complete tutorial for Continuous Integration Tool : Jenkins
What is Continuous Integration?
“Continuous Integration is a software development practice where members of a team integrate their work frequently, usually each person integrates at least daily - leading to multiple integrations per day. Each integration is verified by an automated build (including test) to detect integration
errors as quickly as possible” – Martin Fowler
CI - Workflow

CI - Benefits
- — Immediate bug detection
- No integration step in the lifecycle
- A deployable system at any given point
- — Record of evolution of the project
Jenkins

About Jenkins
- Branched from Hudson
- —Java based Continuous Build System
- Runs in servlet container
- Glassfish, Tomcat
- Supported by over 400 plugins
- SCM, Testing, Notifications, Reporting, Artifact Saving, Triggers, External Integration
- Under development since 2005
- http://jenkins-ci.org/
Jenkins - History
- 2005 - Hudson was first release by Kohsuke Kawaguchi of Sun Microsystems
- 2010 – Oracle bought Sun Microsystems
- Due to a naming dispute, Hudson was renamed to Jenkins
- Oracle continued development of Hudson (as a branch of the original)
What can Jenkins do?
- Generate test reports
- —Integrate with many different Version Control Systems
- Push to various artifact repositories
- Deploys directly to production or test environments
- Notify stakeholders of build status
- …and much more
Step By Step : Process to Install and Configure Jenkins With your Script.
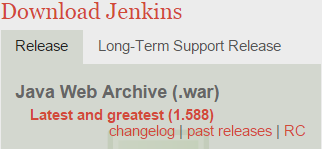
1) Download Jenkins by clicking here:
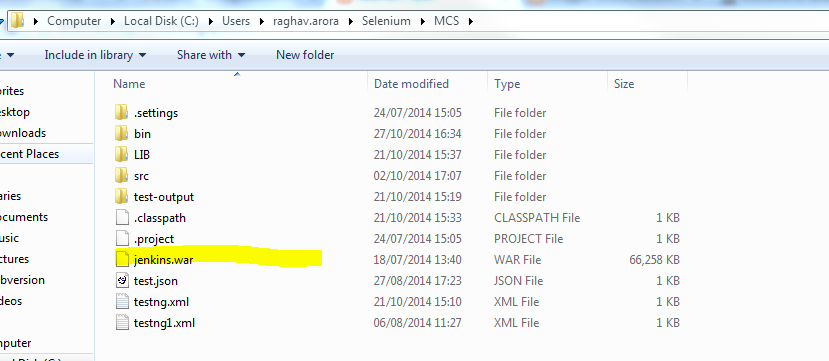
2) Keep the downloaded Jenkins.war file where your project is placed. For Example:
3) Open Command Prompt and go to the project path. Like:

4) After going to that path, write java -jar jenkins.war and press Enter.

5) Open your Browser enter localhost:8080 as URL:

This is a Start up page. Now Click on Manage Jenkins.
6) Now click on Configure System

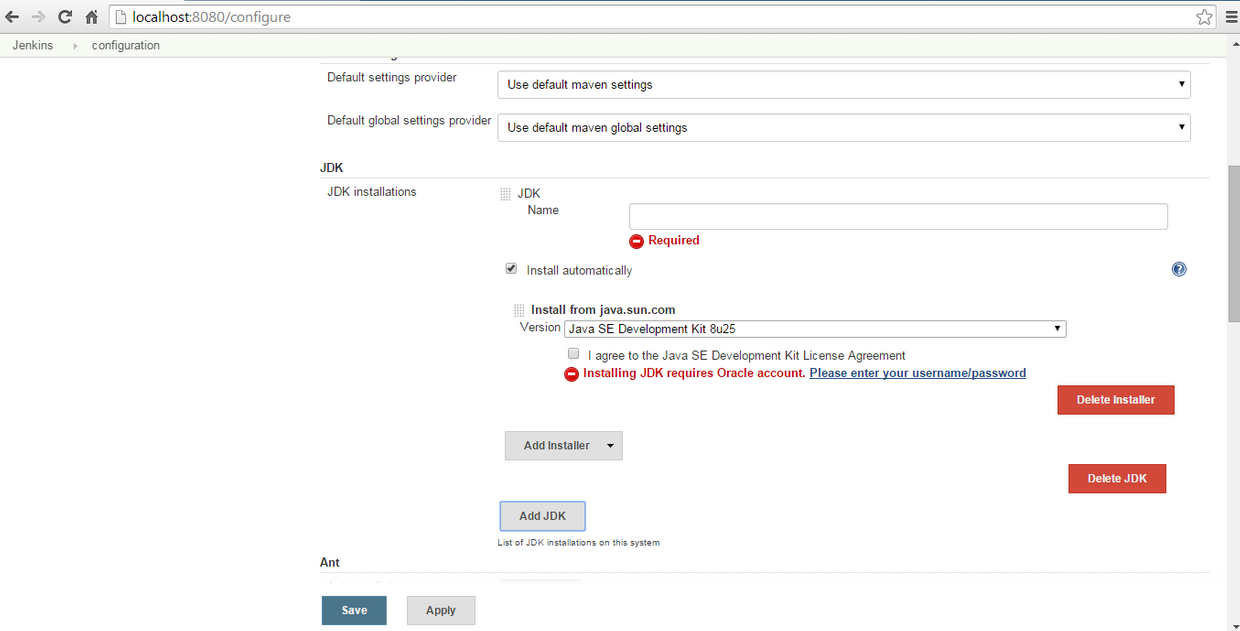
7) Now, set the JDK path. Uncheck the install automatically:
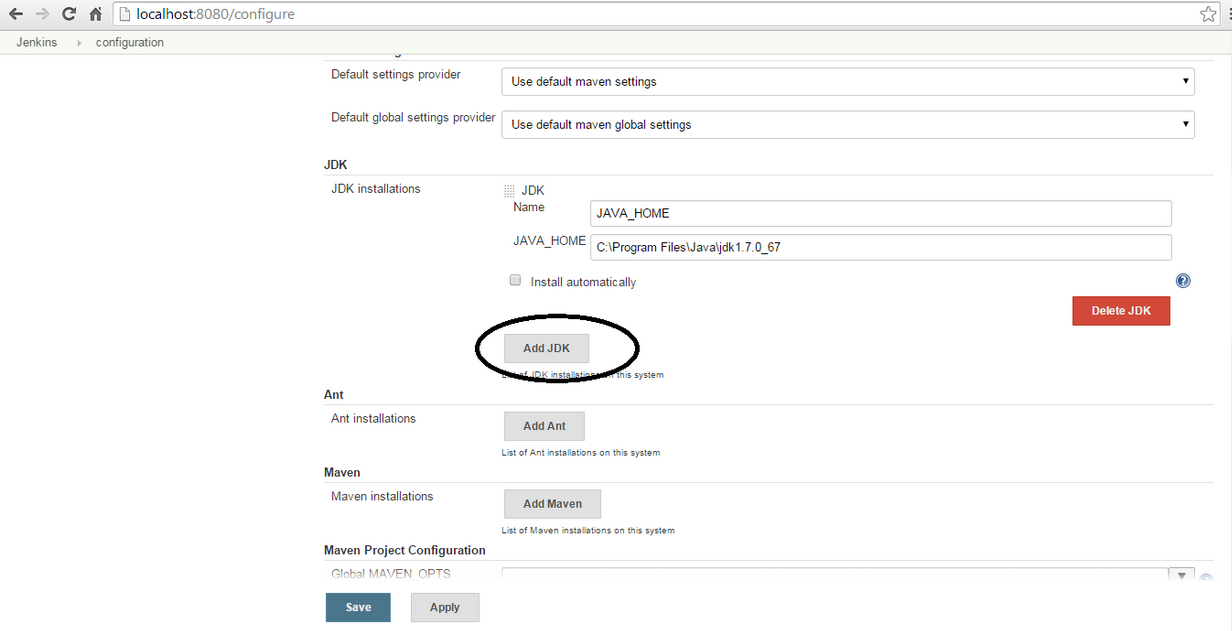
8) Click on Add JDK

9) Set the path of JDK
10) To run TestCases, we have to create a New Job and To create a new job, you need to click on New Item.
- Select FreeStyle Project, as selected in the image
- Give this job a name by writing it in Item Name
- Now, click on OK

11) Once done, click on Advanced button appears on next page:
12) Now, add the Path of your Project in Directory Field and click on save button:

13) Click on Add Build Step:

14) Select Execute Window Batch Command or Ant (If you have ant setup) and add it:
How To Create BatFile?
- Create a folder named LIB in you project directory and place all your jar files there.
- Open notepad and insert below string in it. Save that file with run.bat in your project directory.
java -cp bin;LIB/* org.testng.TestNG testng.xml
15) Open Command Prompt and SetClassPath:
set classpath=C:\Users\raghav.arora\Selenium\MCS\bin;C:\Users\raghav.arora\Selenium\MCS\LIB\*

16) Now Go to Jenkins.Add run.bat and click on Save and Apply.

17) Now, you can click on Build Now button on the left.

18) Below is the output of Test Case we have run. If it is in blue, then that means the executions is successful. If it is red then it means it failed.

Note: You can also schedule your test case. How can you schedule it? Here is the snapshot for that:

This is the Cron job which I've entered in Schedule field. You can learn by clicking here.
To know more about the Continuous Integration Setup, go through with Java in the Cloud: Continuous Integration Setup Tutorial
To know more about the Continuous Integration Setup, go through with Java in the Cloud: Continuous Integration Setup Tutorial


Great effort !!! The detailed information you provided in tutorial is too good. I must say that it's an appreciated effort. Checkout the latest software: Full Version Software | Free Download Software
ReplyDeleteIf we have to run the script on any remote machine than where we will give the machine details(Computer name, username/password) as input. actually what will be the exact way to do this.
ReplyDeleteThanks.
nice article
ReplyDelete